Search This Blog

Sunday, May 12, 2013

Pricing Hand-made Jewelry Correctly

Ever browsed Etsy or Artfire and seen all those shops with lovely items priced extraordinarily low?  And then, when you look at the artisan's sales you find they aren't selling a lot.  Here's what I've learned about selling hand-made jewelry online and at craft shows, in case you're interested.


  1. Profit is not a dirty word. If you are selling something you expect to make a profit, right? 
  2. Hand-made is not synonymous with cheap.  
  3. My time is worth money. 
  4. Buyers can smell a lack of seller confidence. It shows in descriptions, pricing and photography.
  5. The items I create are worth more than any mass-produced item, since no one else has one like it. 
Now, how do you price correctly?

  1. Know the current market value of your supplies and mark them up at least 100%.  Just because you got something on sale doesn't mean you lower your price.  You may not find that item one sale again when you run out. 
  2. Think about a labor cost.  This is important.  If you do not charge for labor you are cheating yourself.  Do you think the stores and boutiques where you might shop don't have labor costs built into their prices?  Don't sell yourself short. 
  3. If you have to ship an item and decide to offer free shipping, make sure you have calculated the cost of shipping and shipping supplies into the price of your item, otherwise you are losing money. 
  4. If you plan to sell at craft shows, it's wise to assess your market first.  Go to local craft shows and watch who is selling and what types of items are selling and for what prices.  Know your customer base.  If you sign up for a craft show in an area where people are interested only in spending less than $20 for an item, then don't put your best, most expensive items out.  They won't sell.  Gear your inventory toward the show.  Know the demographic that is expected to attend.  Plan your inventory accordingly. 
At craft shows, always have supplies on hand to custom-make pieces, and always have pieces to work on so customers can see how your lovely items are made - so they can see the work that goes into them.  If you're just sitting there with all your pretties laid out, customers will treat it as they would the jewelry rack at a big box store and look for the bargains, and if they don't find any to suit, they will then attempt to haggle with you over price, because to them, it's just another jewelry booth.  If they see you working that allows them to come watch and ask questions.  You can show them that you are making a pair of earrings or a necklace similar (but not the same) as something you have displayed.  They can see that there is labor, time, effort and sometimes back breaking labor, that goes into these creations.  Let them see the callouses on your fingers!  

If you have done your research and assessed your demographic appropriately, you should have no problem turning a profit at a craft or art show.  People want to believe they are getting value for their money, HOWEVER, when they see a pair of earrings that are created from sterling silver and unique bead components and that pair of earrings is priced at $12, they may look at them, but odds are good they won't buy.  Why not?  You're cheaper than the stores!  That's why not.  When a pair of sterling silver earrings costs upwards of $50 for something basic and you're selling them for $12 your credibility is called into question.  If you don't put a fair market value on your creations, customers won't believe your items are worth purchasing.  They will smell your lack of confidence in your own creations and move on. 

Is everyone going to buy?  No.  Some people will be outraged that you'd charge "that much" for something "hand made."  So what.  Smile and move to the next customer who is actually going to purchase your hand-made item for "that much."   

Remember, if you are setting up at a craft show, you only profit once you've covered your supply and labor costs, booth rental, and travel and meal expenses.  That means gas and mileage, too...

I'm always open to comments and suggestions, so anyone who has some good input on this subject, please post a comment.  I've covered things in brief, and need to head to bed now.  It's pumpkin time.  :)

Happy creating, everyone!


Tuesday, February 14, 2012

And Now For Something (Almost) Completely Different!

Started this two months ago and then, in my usual ADD fashion, allowed the call of pretty new beads to lure me away.  Finished the basketweave and everything else tonight.  It's an agate slice wrapped in pure copper viking basketweave, topped with a brown iris druk teardrop and copper tube for the hang hook.  The bottom is hung with copper shadow Swarovski (I think that's the name) 6mm, and two copper tubes terminating in the same Swarovski bicones.

To me, it's got kind of a dream catcher-ish look to it.  I like it.  It's not my usual suncatcher fare and I hope to rephoto tomorrow as it hangs in my window (prior to being placed for sale in my shop) with the sun streaming through it.

Thursday, November 3, 2011

Amazing What You Can Do With Beads!

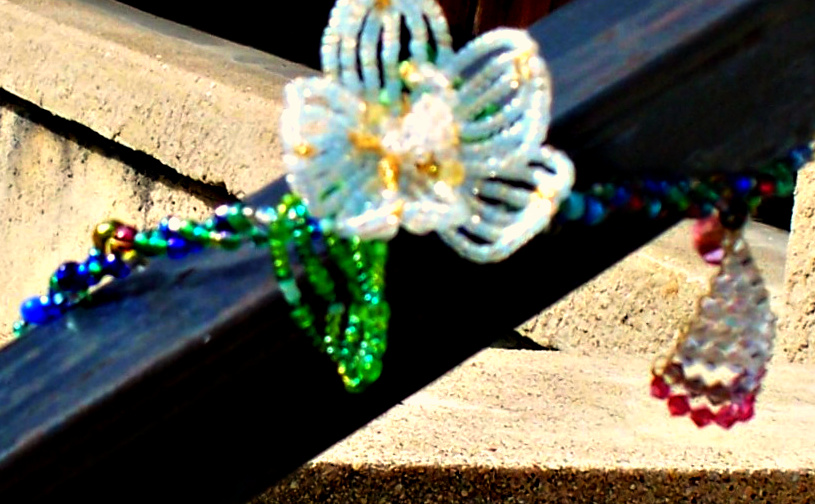
This is a beaded garland that I finished up about 3 weeks ago.  It just sold at the local gift shop.  It's approximately 4 feet long, with a mix of brightly colored beads spun on craft wire.  The embellishments range from french beaded flowers to Swarovski crystal dragonflies and lots of stuff in between.  It's a great way to let your imagination loose.  The woman who bought this is using it on her Christmas tree this holiday season and then will use it in her sun room, looped and swagged in front of the windows so the crystals catch the light.


Wednesday, November 2, 2011

Earrings!

A few easy-to-make earrings created by yours truly. All of these have hand-made earwires. Making earwires is easy. I would strongly suggest that you never buy another earwire, since you can make them yourself much more cheaply.

 All you need is wire, pliers, a mandrel (I use both of the ones shown in the link image and they are well worth the money), a bench block or steel block for hammering. Make sure your block is smooth and free of gouges. If yours is like mine was, you may need to use an angle-grinder to get it back to smooth. More about that later!

 I also suggest using a rawhide mallet or a hard plastic mallet so you don't mar your wire. Years ago, before I bit the bullet and paid what I thought was an atrocious amount for my rawhide mallet (it's invaluable to me now), I would place a piece of suede over my findings before hammering with my chasing hammer. Still not a great way to do it. At least purchase a hard plastic mallet. Beadsmith makes one and it's very affordable. You can buy it here: Dual Head Plastic Mallet and you can also purchase replacement heads for it.  I use this for smaller items rather than trying to work small with a big rawhide mallet.  :)

These are turquoise beads with a "bezel" of 2mm sterling beads


These are copper tubes, freshwater pearls, sterling and copper beads with sterling earwires. 


These are some fun earrings I made with copper wire and garnet beads


These are freeform sterling wire earrings - not my best effort, but fun and easy to make.  They terminate in copper and garnets.  I probably should have soldered the top loop and my camera is better than the human eye, because it picks up things like cut marks made from my flush cuts.  That's a good enough reason to file and solder.  


These are twisted 18ga square sterling wire, hammered and formed (with half-round pliers), and garnet beads on pure copper head pins. 


None of these earrings required soldering, but if you want to make absolutely positive your jump rings won't come apart, you should probably hit them with a torch and solder them closed, if possible. 

I also find that when making earwires, a very easy way to smooth the "pointy" ends is with a metal nail file.  Seriously.  This actually works better for this purpose than any jeweler's file I've used. It's quick, easy, and you're not as likely to take off as much of your fingernails with it as you would a jeweler's file.  :)  

If you have a steel-shot tumbler, it's a good idea to throw all your findings in it for a bit to harden them up, especially if you're working in dead soft wire.  If you don't have one, though, you can work-harden by straightening your wire with a polishing cloth - just run it the length of your wire several times, and/or by lightly hammering when you're finished making earwires.  Jump rings and pins should be put in a tumbler or made with half-hard wire if at all possible.  

I use fine silver or Sterlium for my earwires and other findings.  Sterlium is alloyed with Germanium and doesn't show firescale the way sterling silver does.  Sterling will show firescale when heated because of the copper alloy.  You'll see a darkening after you fire it, and although pickle will remove a bit of this, you'll still be left with some dark spots.  The only time efficient way to deal with that for something as small as a finding is to tumble the item to polish it.  Fine silver won't show fire scale because there's no copper in it.  It's .999 silver which is pretty darned close to pure silver.  

Monday, October 31, 2011

Beaded Christmas Ornament

This one does double duty. It can be hung on the holiday shrub and it can be hung in a sunny window year-round to add some rainbows in your life. I went a bit overboard on this - the frame is 18 ga twisted square sterling silver wire. All the beads except for the cloisonne heart are Swarovski bicones.


And from a different angle:

Beaded Wreath Christmas Ornament

Just finished this. I'm very happy with the way it turned out. How is it made? Simple! I used a round base that had holes in it, but you could just as easily use heavy gauge wire for your base. The greenery is a mix of green seeds (greenery isn't all one color of green!) spun onto 24 ga brass wire. I spun just enough for each "branch" at a time, wired it down to the base, and then spun the next branch. The red beads are round garnet-colored czech glass, 6mm. I'd add one to the wire every few branches and then spin the green seeds on. Each branch is twisted for texture. I simply kept wiring around the form until I got it looking the way I wanted it. The loop is 4mm garnet Swarovski bicones.


This one is Swarovski crystals attached to a 20 ga copper base. I simply coiled copper wire around a dowel, pulled it off, and then carefully stretched it apart until the loops created by the coils showed individually. I looped one end with my pliers and hooked the opposite end of the stretched coils to it to make a circular base.

It's important to hammer this type of base to flatten it, but you don't want to hammer too hard because you may weaken it. Just give it a few whacks with a plastic or rawhide mallet.

Friday, June 17, 2011

PMC Dried Out? Try This

I tried this on a lump I've had for four years, because I'm getting back into PMC/Art Clay. I dug up my lump and it was rock hard. Okay - what is PMC made of? Fine silver, binders and water. Why does it dry up even if it's still in an unopened package? Water evaporates. Doesn't matter what it's in, really - it will evaporate.

All you need to do to get your clay workable again is follow these instructions. It works. I tried it - it's from Tim McCreight's PMC Guild website.

PMC is made of particles of precious metal, an organic binder, and water. The precious metal and the binder stay the same, but it's possible for the water to evaporate over time, even though the PMC has never been opened. If, when you open the box, the PMC is stiff and hard to form, it simply needs more water.

I've successfully re-hydrated PMC that had dried out rock-hard. It's easy to do: open the box and hold the lump of PMC under running water for a few seconds so its surface gets totally wet. Rewrap it in cellophane and set it aside overnight, periodically kneading the lump through the cellophane. The goal is to get the moisture into the PMC. This takes time because it is a very dense material. Unwrap and test the PMC: you should be able to flatten it into a disk without cracks appearing at the edges. If it's still too stiff, wet and rewrap it again and let it sit longer. Two treatments are usually enough, but you may continue until the PMC returns to its original, soft, workable consistency.

Also you can grind the clay up in a spice grinder or pepper grinder into a fine powder, then slowly add water drop by drop allowing time for the moisture to absorb.


This totally works (Tim McCreight is AWESOME) but you MUST be patient. Don't try to work your clay if it has cracks in it the first time you test it after adding water. Just add a few more drops of water, wrap it up again and let it sit overnight - knead it through the wrapping just as you did the first time and test again. You may need to do this a few times depending on how dry it is, but it DOES work. PMC and Art Clay are way too expensive to throw out just because they dried out. So be a smart artisan; rescue and reuse!